

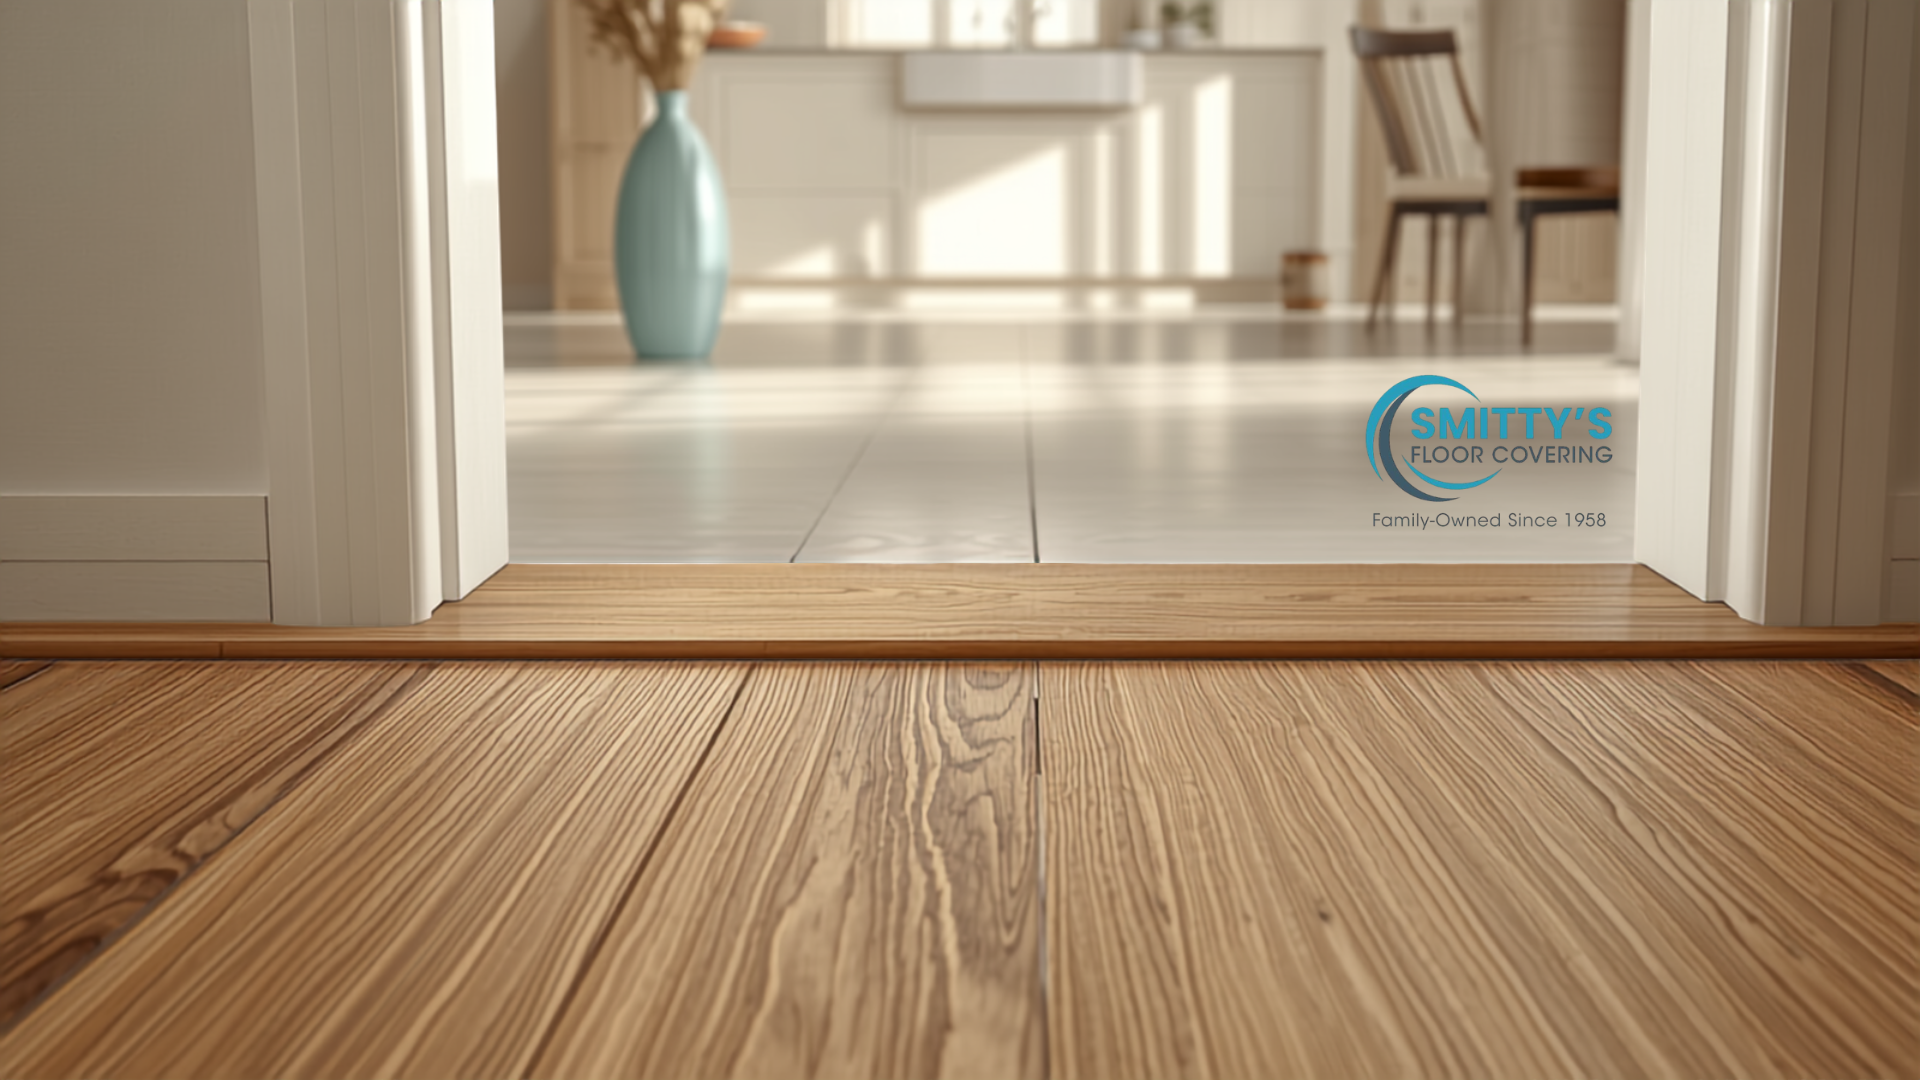
The cleanest hardwood to tile transition is planned before either floor goes down. Match the finished heights, leave the expansion space wood needs, pick a transition profile (or a flush, flexible joint) that suits the height difference and the traffic, and place the change of material where the eye expects it: under a door, at a cased opening, or along a line the room already gives you. Get those four things right and the seam between a tile kitchen and a hardwood living room looks intentional for decades.
About this guide: It comes from the flooring team at Smitty’s Floor Covering in Denton, TX, family owned since 1958 and the oldest family-owned floor covering business in Denton County. We sell and install hardwood, tile, luxury vinyl, laminate, and carpet, and the guidance here follows published installation standards (ANSI and the Tile Council of North America), ADA guidance on changes in floor level, and the instructions flooring manufacturers print for their products.
- Do tile and hardwood go together? Yes, when their undertones agree and the transition sits in a logical place.
- Do you need a transition strip? Usually. Wood needs an expansion gap next to tile, and a strip covers it. A flush, caulked joint is the main exception.
- What if the heights differ? Up to about 1/4 inch, a T-molding or small reducer works; 1/4 to 1/2 inch calls for a reducer; beyond that, build up the lower floor first.
- Which goes in first? Tile is usually installed first, then the hardwood, then the transition.
Do Tile and Hardwood Go Together?
They do, and the combination is one of the most common in Denton-area homes: tile in the kitchen, entry, laundry, and baths where water and grit land, and hardwood in living rooms, dining rooms, and bedrooms where warmth underfoot matters most. Our look at how open-concept homes use flooring to define spaces makes the same case: a continuous wood base with tile marking the work zones reads as a plan, not a patchwork.
Where the pairing goes wrong is almost always color temperature. Wood carries an undertone (red, yellow-gold, neutral, or gray) and so does every tile and grout. When the undertones fight, the seam looks like two remodels that never met. When they agree, even strong contrast looks deliberate.
Choose contrast or continuity on purpose
You have two honest routes. Contrast lets the tile read as its own zone: a light porcelain kitchen against a mid-brown oak living room, for example. Continuity blends the two so the eye barely registers the change: a wood-look porcelain in a similar tone to the hardwood, or a tile that picks up one of the wood’s secondary colors. Our article on monochrome wood-look porcelain shows how far the continuity approach can go. Either route works; splitting the difference usually does not.
Match undertones, then let grout do quiet work
Grout is the third color in every transition, and it covers more of a tile floor than most people expect. A grout that echoes the wood’s undertone ties the rooms together; a stark white or charcoal grout pulls attention to the tile grid. Our guide to sanded, unsanded, and epoxy grout options covers the performance side, and tiles with rectified edges let you run thinner grout joints for a calmer look next to wood.
| If your hardwood is… | Tile tones that pair well | Grout that helps | Usually avoid |
|---|---|---|---|
| Natural white oak | Warm white, greige, soft limestone looks | Warm gray, linen, almond | Blue-gray and stark bright white |
| Honey or golden oak | Cream, warm beige, travertine looks | Tan, sand, light brown | Cool gray concrete looks |
| Red oak or cherry | Warm taupe, terracotta, deep cream | Mocha, warm gray | Pink-leaning beige that competes with the red |
| Gray-washed or weathered | Cool white, concrete looks, charcoal slate looks | Pewter, light or mid gray | Yellow-cream tile |
| Espresso or dark walnut | Light marble looks, crisp white, pale greige | Soft white, silver gray | Mid-brown tile that is close but not matched |
Undertones shift under your own lighting, so bring a board or plank and hold tile samples against it in the room where they will meet. You can browse our hardwood selection and our tile catalog online, including styles from Dal-Tile, Marazzi, and Ragno, then compare the finalists side by side in our Denton showroom.
Why Wood-to-Tile Transitions Need Planning
A transition between two floors is a meeting of two materials that behave very differently, and that difference is what the transition has to manage.
Wood moves; tile does not
Hardwood is a natural material that expands as it takes on humidity and shrinks as it dries. North Texas gives it plenty to react to: humid spring storms, long air-conditioned summers, and dry, heated winter air. Tile and grout, set in cement-based mortar, barely move at all. If a wood floor is pushed tight against tile with no room to grow, it has nowhere to go when it swells, and the result is cupping, buckling, or a chipped tile edge. That is why most wood floors need an expansion gap wherever they meet tile, commonly in the 1/4 to 3/4 inch range depending on the product, the width of the floor, and the manufacturer’s instructions. The transition piece exists largely to cover that gap.
Heights rarely match on their own
Solid hardwood is typically 3/4 inch thick. Floor tile is often 5/16 to 3/8 inch, plus the mortar beneath it, and sometimes a backer board or membrane under that. Engineered hardwood, luxury vinyl, and laminate each bring their own thickness. Two floors that look like they should meet evenly on paper often finish 1/8 to 1/2 inch apart once every layer is counted.
Wet rooms meet dry rooms
Most wood-to-tile seams sit at the edge of a kitchen, bath, laundry, or entry, exactly where spills, mop water, and tracked-in rain collect. A good transition keeps water from running under the wood edge and gives you something you can wipe clean. That is also why porcelain tile, which absorbs almost no water, is the usual choice for these zones.
How to Match Floor Heights Between Hardwood and Tile
Start by adding up every layer on each side. The table shows common thicknesses, and the calculator below does the math for your combination.
| Layer | Typical thickness | Notes |
|---|---|---|
| Solid hardwood | 3/4 in (19 mm) | Nailed or stapled over a wood subfloor |
| Engineered hardwood | 3/8 to 3/4 in (9.5 to 19 mm) | Glue-down on slabs is common in Denton County |
| Rigid-core luxury vinyl | 4 to 8 mm plus any attached pad | Floats, so it needs its own expansion gap |
| Laminate | 7 to 12 mm plus underlayment | Floats; treat like luxury vinyl at edges |
| Porcelain or ceramic floor tile | 5/16 to 1/2 in (8 to 12.7 mm) | Large-format tile is often thicker |
| Thin-set mortar under tile | About 1/8 to 1/4 in after setting | Depends on trowel notch and tile size |
| Uncoupling membrane | About 1/8 in | Common over wood subfloors and cracked slabs |
| Cement backer board | 1/4 or 1/2 in, plus mortar beneath | Used over wood subfloors |
Pick the layers on each side. The calculator totals both floors, shows which one sits higher, and suggests a transition.
Hardwood side: 3/4 in (19.1 mm) · Tile side: 1/2 in (12.7 mm)
Small step. A T-molding can bridge it, but a reducer or a slight build-up gives a smoother edge. Under ADA guidance, a vertical change up to 1/4 in is acceptable.
Figures are typical; confirm actual product thicknesses before ordering trim.
Once you know the gap, you have four ways to close it:
- Build up the lower floor. A layer of plywood or underlayment under the thinner floor is the most common fix when the difference is large. It has to be flat and fastened properly, which is where floor leveling and a sound subfloor earn their keep.
- Adjust the tile assembly. A thicker tile, a medium-bed mortar for large-format tile, or a membrane instead of backer board can shift the tile side up or down by a fraction of an inch, within the limits the mortar and tile makers allow.
- Choose a transition built for the step. Reducers are made to ramp down from a taller floor to a shorter one.
- Accept a small, safe step. ADA guidance, a good benchmark for any home, allows a change in level up to 1/4 inch with no treatment, a beveled edge no steeper than 1:2 between 1/4 and 1/2 inch, and a ramp beyond that. Anything that catches a toe or a walker is worth fixing.
Types of Hardwood to Tile Transition Strips
The right transition depends on the height difference, how much traffic crosses it, and whether the joint needs to disappear or can be a visible design line. Tap each type to see how it sits in cross-section.
Best for: floors that finish within about 1/8 inch of each other. The cap covers the expansion gap and overlaps both surfaces slightly. Watch for: it sits a little proud of the floor, so it is felt underfoot and can snag a vacuum if poorly fastened. Wood T-moldings are usually made to match the flooring’s species and stain.
Best for: a taller floor stepping down to a shorter one, the classic case of 3/4 inch hardwood meeting thinner tile on a slab. Watch for: the bevel should be gentle; a steep reducer becomes a trip lip. The reducer attaches to the taller side and leaves the expansion gap free.
Best for: doorways, especially into bathrooms, where a marble or engineered stone saddle adds a clean frame and a small water check. Watch for: it needs its own flexible joint on the wood side, and its height should split the difference between the two floors rather than add a new step.
Best for: designers who want no trim at all. The floors are brought to the same height and separated by a narrow joint filled with a flexible, color-matched sealant or cork so the wood can still move. Watch for: it demands careful height matching and a stable, well-acclimated wood floor. Never fill this joint with grout or rigid caulk.
Best for: modern spaces and protecting the exposed edge of tile. An L-shaped metal profile is set into the tile mortar, and the wood butts against it with a small gap. Finishes range from brushed stainless to bronze and black. Watch for: the profile height must match the tile thickness exactly.
Stair nosing and end caps round out the family. End caps (sometimes called baby thresholds) finish wood where it stops against a vertical surface such as a sliding door track or a fireplace hearth. If a transition also marks the top of a stair, use a flush stair nose made for that flooring.
Creative Transition Layouts: Straight Lines, Hexagon Scribes, and Tile Rugs
A transition does not have to be a straight line. The layout of the seam can become a design feature, as long as the wood still gets its expansion space.
Straight line. The most common and the most forgiving. Run it under a door or along a wall line, and it works with any transition strip. Skill level: standard.
Staggered planks. Planks end at different points so the tile and wood interlock like a zipper. It softens the line in open floor plans. Every plank end still needs a small flexible joint, and the tile has to be cut to match each step. Skill level: advanced.
Hexagon scribe. Hexagon tiles appear to scatter into the wood, and each plank is scribed to the hexagon edges. It is a showpiece at a kitchen or entry edge. The wood must be fully acclimated, and the joint is finished with a color-matched flexible sealant, not grout. Skill level: expert, with more labor.
Tile rug inlay. A panel of patterned tile set into the hardwood, often framed by a wood border, marks an entry, a dining area, or the space in front of a range. The tile and wood heights must match for a flush inlay, so the tile area usually needs its own build-up. Skill level: expert.
Stone threshold. A marble or quartz strip frames the change of material in a doorway and gives a bathroom a subtle edge against water. It is a clean, traditional choice. Skill level: standard.
The tile rug is popular for good reason: it gives a hardwood entry a durable landing zone for muddy boots without breaking up the wood through the rest of the house. Our guide to entryway floors that stand up to Texas grit explains why porcelain handles that job so well.
Where Should the Transition Between Hardwood and Tile Go?
Put the transition where the room already changes: under a door, at a cased opening, at the end of a cabinet run, or on a wall line. Tap each location to see the reasoning.
Under the door, centered on the slab. When the door is closed, you see only one floor from each room. Check that the door swing clears the taller floor and any threshold.
Align with a fixed line in the kitchen. In an open plan, run the transition along the face of the cabinets, the end of a peninsula, or a line squared off the island, never diagonally through a walkway. Keep a comfortable margin so the tile covers the whole working area in front of the sink and range.
Give the entry a defined landing zone. Tile at the front door should extend far enough for someone to step fully inside and close the door, then stop at a wall corner or a squared line into the living area.
Use the opening, not the middle of the hall. Where a hallway leads into a tile area, place the change at the doorway or cased opening so the hall floor runs unbroken.
Pay attention to plank direction as well. Wood planks that run parallel to the transition give a crisp line; planks that run into it need each end finished neatly. And where a wood floor wraps around a tiled kitchen in an L shape, plan the corner so neither floor ends in a sliver.
Planning tile next to hardwood? Our free in-home measurement counts every transition and threshold in the house so trims are right the first time.
Book a Free MeasurementTransitions Between Tile and Luxury Vinyl or Laminate
The same rules apply when the plank floor is luxury vinyl or laminate instead of hardwood, with two differences. First, most of these floors float, so the expansion gap required by the manufacturer (often around 1/4 inch) is not optional; a floating floor pinned against tile can peak or separate. Second, they are thinner than 3/4 inch hardwood, so the tile side is more likely to be the taller one, and a reducer may face the other direction. Many luxury vinyl collections offer matching T-moldings, reducers, and end caps, so ask for the trim when you choose the floor.
If you are still deciding between wood and a waterproof plank for the rooms around your tile, our hardwood flooring overview and tile flooring overview are good starting points.
Common Hardwood-to-Tile Transition Mistakes
- Closing the expansion gap. Wood butted tight to tile, or a gap filled with grout, leaves the wood nowhere to go in humid weather.
- A trip lip. A step taller than 1/4 inch with no bevel is a hazard, especially for kids, older family members, and anyone carrying laundry.
- A line in the wrong place. A transition floating in the middle of an open room, or a sliver of tile along a wall, looks accidental.
- Ignoring the door. A new, taller floor can stop a door from swinging. Doors may need trimming.
- Undertones that clash. A cool gray tile against warm red oak shouts across the seam.
- Skipping acclimation. Wood installed before it adjusts to the home’s conditions keeps moving after the trim goes on, opening or closing the joint.
- Weak trim fastening. A loose T-molding rattles and eventually lifts. Transitions need to be glued or mechanically fastened to a track, as the maker specifies.
Installation Order and What to Expect
In most projects the tile goes in first. Tile work is wet and messy, and the mortar and grout need time to cure, typically a day or more before normal foot traffic and longer before heavy loads, depending on the products used. The hardwood follows, with its expansion gap set at the tile edge, and the transition is installed last. If the wood already exists and only the tile is new, the installer protects the wood edge and plans the tile height to meet it.
At Smitty’s, the process starts with a free in-home measurement, where we count stairs and transitions along with the square footage so the trim is scoped before installation day. Our installation team handles every floor we sell, so tile, hardwood, and trim come together as one plan instead of three separate jobs. When the tile is part of a larger update, our kitchen and bath remodeling service keeps the whole project under one roof. If you are replacing tile with wood rather than joining them, our article on installing hardwood over tile covers when that works.
What Affects the Cost of a Hardwood-to-Tile Transition?
Transitions are a small line item compared with the floors themselves, but a few choices move the number:
- Trim type and material. Stock wood or vinyl moldings cost less than stone thresholds or metal profiles.
- Height correction. A plywood build-up or leveling work adds material and labor.
- Layout. A straight line is quick; staggered planks, hexagon scribes, and tile rug inlays take hours of careful cutting.
- Number of transitions. Every doorway, closet, and opening adds another piece.
- Door adjustments. Trimming doors or adjusting thresholds for the new height.
If new tile and hardwood are part of a larger update, our flooring financing options can cover the whole project.
Hardwood to Tile Transition FAQs
How do you transition from hardwood to tile when the heights are different?
Measure both finished floors, then close the gap. Differences under about 1/4 inch can be bridged with a T-molding or small reducer; 1/4 to 1/2 inch calls for a beveled reducer; anything larger should be corrected by building up the lower floor or changing the tile setting method before trim is chosen.
Do you need a transition strip between hardwood and tile?
In most cases, yes. Hardwood needs an expansion gap where it meets tile, and a transition strip covers that gap while protecting both edges. The main exception is a flush joint filled with a flexible, color-matched sealant or cork.
Can hardwood and tile be installed flush?
Yes, if the heights are matched carefully and the joint between them stays flexible. Flush transitions work best with a well-acclimated floor and a skilled installer, and they should never be filled with grout.
What is the best transition strip for hardwood to tile?
There is no single best strip. A T-molding suits floors of equal height, a reducer suits a taller wood floor stepping down to tile, a stone threshold suits bathroom doorways, and a metal profile suits modern spaces or exposed tile edges.
Should the transition between tile and wood be under the door?
Yes. Centering the transition under the door slab means each room shows only its own floor when the door is closed, and the line looks intentional when it is open.
Should tile or hardwood be installed first?
Tile usually goes in first because it involves wet mortar and grout that need time to cure. The hardwood goes in next with its expansion gap at the tile edge, and the transition strip goes on last.
How much gap should be left between hardwood and tile?
Follow the flooring manufacturer’s instructions. Expansion gaps are commonly in the 1/4 to 3/4 inch range for wood floors and around 1/4 inch for floating luxury vinyl and laminate, and the transition must cover the gap without pinning the floor.
Can you put a tile rug in a hardwood floor?
Yes. A tile rug inlay sets a panel of tile into the hardwood, usually with a wood border. It needs matched heights, a flexible joint around the panel, and precise cutting, so plan it before the wood goes down.
Hardwood and Tile Installation in Denton and Nearby Towns
Many homes in Denton County sit on concrete slabs, which makes tile a natural fit and means engineered hardwood is often glued directly to the slab. Older pier-and-beam homes around town bring wood subfloors that need a backer board or membrane under tile. Both situations change the height math, which is why we look at the floor itself before recommending a transition.
Visit our showroom at 1815 N Elm in Denton to see tile and hardwood side by side, or read what our customers say about working with our family. We serve Denton, Corinth, Hickory Creek, Krum, and Ponder, along with Argyle, Aubrey, Flower Mound, Lake Dallas, Lewisville, and communities across Denton County.
Plan a Seamless Hardwood and Tile Floor
Bring your tile and wood ideas to Smitty’s Floor Covering. We’ll match heights, finishes, and transitions so the two floors meet beautifully.
Request Your Free Estimate →


